|
~
Activities ~

Class Shape Book: Make a class shape book by having
your students complete the sentence frame:
When Rudolph
__________,
his nose turned
________.
The students complete
the first blank by writing in something that Rudolph could do,
then complete the second blank by rhyming the action with a
color word.
For ex:
When Rudolph jumped out
of bed,
his nose turned red.
When Rudolph acts like
a funny fellow,
his nose turns yellow.
(slight change in the sentence frame)
So it would help, if
before beginning to write the rhymes, the class generated
words that rhymed with the color words. For instance,
red: bed,
said, head, Ted, instead, dread, shed
yellow: fellow,
mellow
green: bean,
mean, seen, screen, Halloween, sheen, lean, queen, careen
blue: hue, Hugh,
stew, flew, dew, do, sue, shoe, threw, few
After the rhymes are
written, type each one up on a page shaped like a reindeer
head. Have each student illustrate their page and cut it
out. Then bind all the pages together to form a class
book.

Foot and Handprint
Reindeer:
Trace around each students' footprint (with the shoe on!) onto
brown construction paper, and around each hand onto white or
tan construction paper. You will have one footprint and
two handprints per student. The footprint becomes the
reindeers head (heel is the nose) and the handprints are the
two antlers. Glue the antlers to the back of the head,
then add wiggly eyes, and a red or black pom-pom nose.
We've used this and glued it onto red or green large size
construction paper to be used as a placemat. Don't
forget to add student's personal info and year because it will
no doubt become a keepsake, especially if you go to the
trouble of having them laminated.
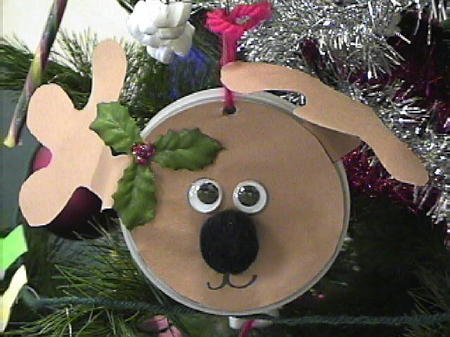
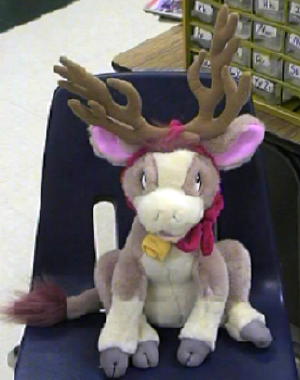
Red Nosed Reindeer
Ornament: Use a small plastic margarine or potato
chip can lid as the base. Cut brown construction paper
or felt circles to fit the lid. Glue the circle(s) on
[front and back, or just front]. Add either paper or
pipecleaner antlers to the back. Then add wiggly eyes,
facial features and a red pompom for a nose. Hot glue a
small silk sprig of holly in front of one antler and add one
or two 3 sided red plastic beads. Glue a piece of red
yarn or ribbon on the back between the antlers for a hanger.
The ornament in the picture below is quite old, so his antlers
are bent and not what they use to be. :)
click on image
to enlarge
Another Red Nosed
Reindeer Ornament: Turn a dog biscuit vertically
(like Milk Bone) and hotglue small wiggly eyes close to the
top. Then glue a tiny red pompom towards the bottom of
the biscuit. Cut a brown pipecleaner in half to form
antlers. Glue each antler on behind the biscuit.
Twist the pipecleaner to form antlers. Glue a loop of
red ribbon or yarn to the back as a hanger. This can
also be used to make pins and necklaces.
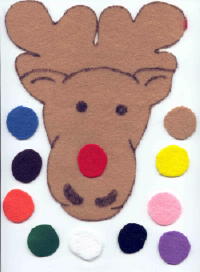
Get Ready, Rudolph
Flannelboard Activity: Use the poem "Rudolph!
Rudolph!" in conjunction with with your flannelboard for a
good phonemic awareness activity. Cut a reindeer head
from brown felt and add facial features with a black marker.
Cut out a round nose for each color listed in the poem.
Put the reindeer head on the flannelboard with all the noses
lined up overhead. Read the rhyme to the class as a
group, but stop before saying each color. Have the
students complete the rhyme by giving you the correct color.
You then add the appropriate color nose to the reindeer.
When removing the already used nose, place it below the
reindeer. If the students get stuck on a rhyme, they can
look at the colors of the noses above the reindeer's head to
aid them in their choices.
Rudolph! Rudolph!
book: You can also turn this poem into a book for
your students reinforcing colors/color words.
Reindeer Names:
Begin by making a list of Santa's nine reindeer ...
+ Rudolph
+ Comet
+ Cupid
+ Donner
+ Blitzen
+ Dancer
+ Prancer
+ Dasher
+ Vixen
Then choose a color of
construction paper for each reindeer name. For instance,
Rudolph could be red, Comet could be yellow, etc. Then
use only that color to cut out all the letters for the
reindeer's name using the Ellison machine. (All
Rudolph's letters would be red for his name. All Comet's
letters would be yellow for his name.)
Once you have all the
letters cut out, glue them onto 3x5 index cards turned
vertically. If you want to use them in the pocketchart
(which is a good idea), then you'll need to trim 1 inch off
the end of each card, because the pocketchart strips are only
4 inches apart. Before gluing, lay all the cards out for
that particular name and center the letters on the cards.
This keeps the letters pretty much in line so that you don't
have some letters at the bottom of the card, then letters with
a "tail" standing up taller than the others. Once you
get all this done, then laminate them.
The students use the
master list of names that you made (so get it laminated as
well) to unscramble the letters to form each of
reindeers' name. They should first sort out the letters
into colors, then begin unscrambling them in the pocketchart.
For those students who need assistance, you might have a
different list of names that are color-coded to the colors you
chose to cut the letters from. Then at least they'd know
which name they were working on.
Reindeer Facts book:
|
 |
|
pages can be found in
The Mailbox
Dec/Jan 1998 -
99 Kindergarten |
Candy Cane Reindeer Ornament: You'll need a large
size candy cane, wiggly eyes, a red pom-pom, and a green
pipecleaner. Glue the two wiggly eyes just below the
crook of the candy cane (but not on the long side).
Then add the red pom-pom towards the short end of the candy
cane for the nose. Then bend the pipecleaner in half
and tightly twist it several times around the crook of the
candy cane, leaving much of both ends sticking up.
Fashion the remaining ends of the pipecleaner into two
antlers. If the pipecleaner doesn't want to stay in
one place, add a drop of hotglue to hold it.
Rudoloph's Reindeer Antlers: Cut strips of brown
construction paper about one inch wide and fit to the head
of each student. Trace both of their hands onto
another sheet of brown construction paper and have them cut
them out. Cut another strip of brown construction
paper about one inch wide for each student to run from the
band around their head down to the tip of their nose.
Glue or staple it to the head band, then add the handprint
as antlers. Have each student cut out a red circle
from construction paper about 1 inch wide and glue on red
glitter. When dry, glue these to the end of the
construction paper strip that runs down the nose. This
should form the reindeer antlers and Rudolph's red nose.
Puzzle Piece Reindeer Ornament: You'll need 3
puzzle pieces for each reindeer. Spray paint them gold
and arrange two side by side with any stick out pieces
sticking up to form the antlers. Lay the third piece
over the bottom tips of the first two with any stick out
piece pointing down to form nose. Glue down.
Glue a tiny red pom-pom on the nose piece and two small
wiggly eyes where appropriate. Glue a loop of red yarn
or ribbon on to the back for a hanger.
Magic Reindeer Food: Have students measure 1/4 cup
oats into a baggie with 1 t. of colored sugar. Tie the bag
and attach the following poem:
Magic Reindeer Food
On Christmas Eve,
Before you go to bed,
Sprinkle this magic
reindeer food on your lawn.
The magic sugar
sparkling in the moonlight
And the smell of the
oats will help
To guide Rudolph to
your house.
Merry Christmas!
Craft Stick
Reindeer: Glue 3 craft sticks in the shape of a
capital A. Allow the the cross piece to stick out a
little on each side. The point is the reindeers nose,
and the two pieces sticking up are the antlers. Glue
wiggly eyes onto the cross piece and a red pom-pom onto the
point.
Peppermint
Reindeer: Cut out a large candy cane shape from
white construction paper. Add red stripes with marker.
Trace students hands on brown construction paper. Cut
out and glue side-by-side to top of candy cane for
reindeer's antlers. Add a red pom-pom nose to the
crook of the cane and a wiggly eye where appropriate.
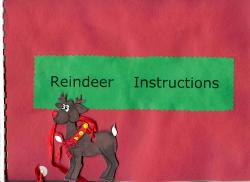
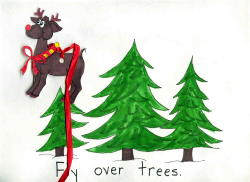
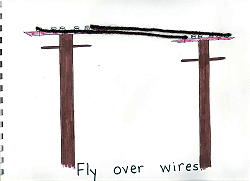
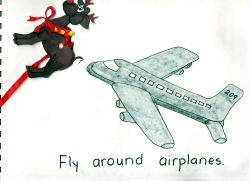
Reindeer
Instructions: This book is one of Kim's books. My
TA at the time made this book, but I don't think we ever got
around to making it with the class. However, when she
did the model book, she made the reindeer going the wrong
way and the ribbon is a little too short, but you get the
idea. The instructions for the book are posted here:
http://www.kindernetonline.com/classbooks3.html
Reindeer Food:
Place bird seed in a ziploc bag and attach these instructions
on a green piece of paper: If you want a good laugh from
the parents, you can add a red-hot as a battery for Rudolph's
nose!
Tis the night before
Christmas
And since every year
You feed Santa Claus
Now feed his reindeer.
Reindeer Food
1. Wait until Christmas
Eve
2. Spread contents on
lawn
3. Hop into bed!
4. Shh! Listen for
Santa!
5. Close your eyes and
watch sugar plums dance.
(contains enough for
eight tiny reindeer)
Magic Reindeer Hay:
Put hay into a small lunch bag. Fold down the top
and staple shut. Turn the bag into a reindeer by adding
handprint antlers, wiggly eyes, red pom-pom nose.
Magic Reindeer Hay
'Tis the night before
Christmas
Santa will soon be here
We give cookies to
Santa
Now let's feed his
reindeer.
Directions:
On Christmas Eve, just
before going to bed, sprinkle the reindeer food on your lawn,
jump into bed and quietly wait for Santa. He and his
reindeer will soon arrive.
Poem for Reindeer
Food:
Reindeer Food
Up on the housetop
reindeer pause,
And wait for good old
Santa Claus.
So while Santa is
spreading his good cheer,
Let's leave some food
for his reindeer!
Reindeer Hoofprints:
Use a split dowel rod to make tiny reindeer hoofprints in the
snow. Now how sneaky is that?!? :)
Wild Christmas
Reindeer: After reading the book, make reindeer
paperbag puppets, but add a red harness across the bottom with
colored shapes on it. Use the book for guidance.
Reindeer Toast:
Toast one slice of bread for every two students. Cut toast in
half diagonally. Each student will spread peanut butter
on their half of the toast, then add 2 curled pretzels for
antlers, raisin eyes, and a cherry for the nose. Great
way to introduce/reinforce 1/2!
Reindeer Treat: Instruct
students to create a trail mix that will reinforce their
counting skills. Have them decorate one side of a brown
paper lunch sack with a reindeer face (black eyes, a red
nose). Then have them count 10 peanuts, 10 M&Ms, 10
raisins, 10 chocolate chips, 10 peanut butter chips, and 10
Quaker Oat Squares into the bag. Then fold the top of
the bag down and staple. Have students trace around each
of their hands onto brown construction paper and cut out.
Staple the hands to the top - back of the bag to form the
antlers for the reindeer.
Reindeer Cookies:
Provide each student with a Nutter Butter cookie and chocolate
frosting. Have them frost one side of the cookie and add
two small curled pretzels at the top for antlers, two
raisin eyes, and a red M&M for the nose. |